Our Location
Killa-Pardi, Dist. Valsad, 396125


A bearing may be manufactured to extremely precise tolerances, but even a high-quality bearing can suffer premature failure if it is installed incorrectly. Incorrect mounting force, contamination, shaft misalignment, excessive heating, wrong lubricant, improper bearing fit and poor handling can significantly reduce bearing life.
Bearing installation is therefore not simply the process of putting a bearing onto a shaft. It is a precision maintenance operation involving bearing selection, shaft and housing inspection, correct fitting, proper mounting tools, alignment, lubrication, internal clearance and post-installation checks.
According to SKF, proper bearing installation requires skill, cleanliness, the correct mounting method and appropriate tools. SKF also warns that direct blows, contaminated grease, dirty tools and incorrect mounting techniques can damage rolling bearings.
This guide explains the 10 most common bearing installation mistakes, why they happen, how they cause bearing failure and what maintenance professionals can do to prevent them.
Bearing installation is the controlled process of fitting a rolling bearing onto a shaft or into a housing while maintaining the required fit, alignment, cleanliness, internal clearance and lubrication.
A correct bearing installation should ensure that:
The importance of these steps is supported by both SKF and Timken engineering guidance. Timken specifically states that cleanliness of the bearing and mating components, together with proper tools, is critical to bearing performance.
Bearing Installation Mistakes can lead to premature wear, overheating, vibration, noise, and unexpected bearing failure.
From improper mounting and misalignment to over-tightening and contamination, small installation errors can cause costly downtime.
One of the most common bearing mounting mistakes is hitting the bearing directly with a hammer.

A technician may try to force a tight bearing onto a shaft by striking the inner ring or outer ring. This can create shock loads that are transmitted through the rolling elements and raceways. The result may include:
SKF specifically recommends that mounting force should not be transmitted through the rolling elements. When cold mounting, the force should be applied to the ring having the interference fit.
Use:
Never hammer directly on the bearing ring or use a mounting method that transfers force through the rolling elements.
This mistake is closely related to direct hammering but is important enough to discuss separately. Suppose a bearing has an interference fit between its inner ring and shaft. If the installer applies force to the outer ring while pressing the bearing onto the shaft, the mounting force travels through the balls or rollers. That can permanently damage the raceways.
For example, if a 6205 deep groove ball bearing is being pressed onto a shaft with an interference fit, the mounting force should normally be directed through the inner ring, not the outer ring.
SKF explains that applying force to the loosely fitted ring can transfer the mounting force through the rolling elements and cause brinelling of the rolling surfaces.
Press the ring that has the interference fit.
This simple rule can prevent expensive bearing damage.
Contamination is one of the most underestimated causes of bearing failure. Before bearing installation, technicians should inspect and clean:
Small particles of metal, dust, rust or old lubricant can interfere with proper seating.
Timken recommends thoroughly cleaning shafts, housings and lubrication holes before bearing installation. It also warns that burrs, foreign material and raised surfaces can contribute to misalignment.
Foreign particles can enter the bearing and produce:
Particle → indentation → stress concentration → surface damage → vibration → wear → premature failure
Keep the new bearing inside its original packaging until immediately before installation. Do not place the bearing directly on a dirty workbench.
SKF recommends storing bearings in their original packaging and keeping them in a clean, dry environment.
A new bearing cannot compensate for a damaged or incorrectly machined shaft. Before installation, inspect:
A shaft that has become undersized due to wear may produce an insufficient fit. Conversely, excessive interference can reduce internal clearance and increase operating temperature.
Consider a bearing with a nominal 20 mm bore.
A technician may assume that any shaft close to 20 mm is acceptable. In reality, the required shaft tolerance depends on:
Therefore, 20 mm bore alone does not determine the correct shaft fit.
Timken provides fitting-practice guidance based on application conditions rather than relying on a single universal fit.
Use calibrated measuring equipment such as:
For precision applications, follow the bearing manufacturer’s dimensional and tolerance recommendations.
Thermal mounting is an excellent method for installing medium and large bearings—but uncontrolled heating can be destructive.

Using an open flame or blowtorch can create localized hot spots and uneven thermal expansion.
SKF recommends controlled heating methods and warns against direct flame heating. Its installation guidance states that bearings should not be heated beyond specified limits; Timken similarly gives temperature limits for standard and precision bearings.
Excessive heat can cause:
A modern bearing induction heater provides controlled and relatively uniform heating.
It is particularly useful for larger bearings where cold mounting would require excessive force.
Do not use one universal temperature for every bearing.
Always follow the bearing manufacturer’s installation temperature specification for the specific bearing, seal, cage and lubricant.
Bearing fit is one of the most important parts of bearing installation.
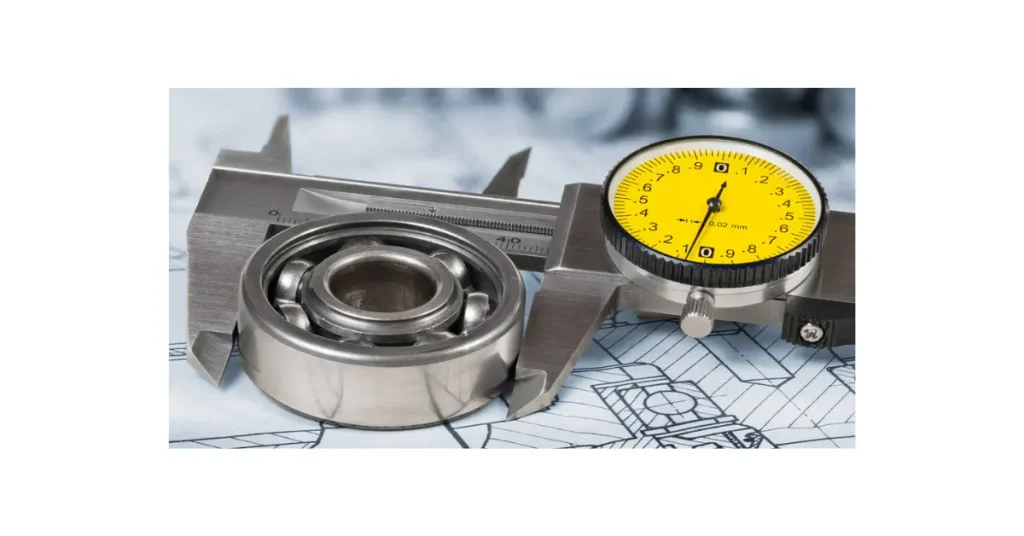
The basic choices include:
The correct fit depends on application conditions.
Important factors include:
An incorrect fit can produce serious problems.
Possible consequences:
Possible consequences:
Timken notes that internal clearance can compensate for effects of interference fits and thermal expansion, making correct fitting and setting an important part of bearing installation.
Many technicians concentrate on bearing dimensions such as ID, OD and width but overlook internal clearance.
Common bearing clearance designations include:
C3 bearing clearance is especially common in applications where operating temperature and interference fit require additional internal clearance.
For example, electric motors frequently use bearings with specified internal clearance depending on the application and manufacturer’s design.
If installation changes the intended internal clearance, the bearing may operate under excessive preload or insufficient clearance.
Incorrect clearance can lead to:
This is why bearing installation should not be treated as a simple press-fit operation.
For tapered roller bearings and some other bearing types, setting may involve axial adjustment rather than simply checking radial clearance. Timken notes that radial internal clearance is typical for many bearings, while tapered roller and angular-contact bearings can require axial setting procedures.
Bearing lubrication is essential, but more lubricant does not automatically mean better lubrication.
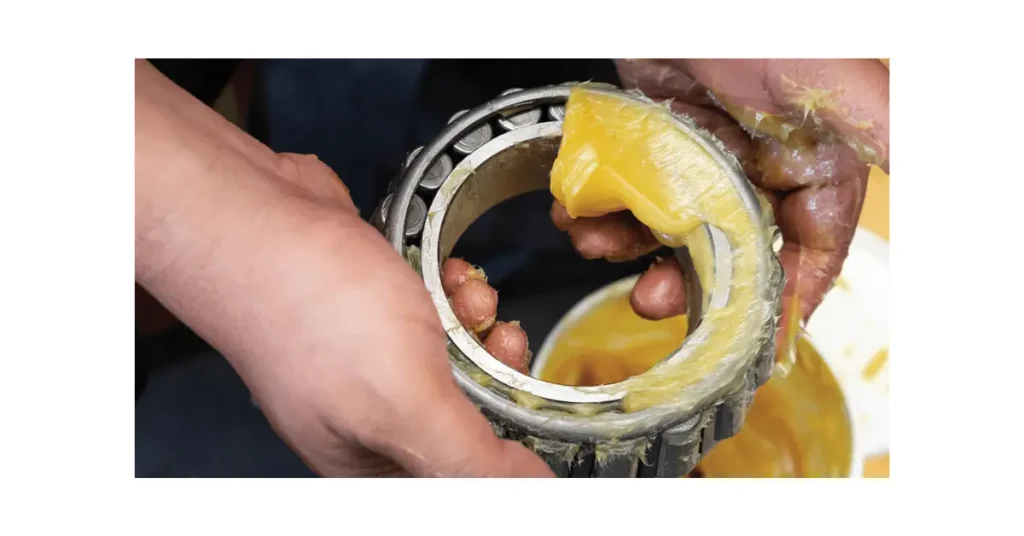
Common lubrication mistakes include:
The correct lubricant depends on:
SKF emphasizes that contaminated grease or oil can contribute to bearing damage.
Grease is widely used because it is easy to retain and provides sealing/protection.
Oil lubrication can be advantageous where heat removal, very high speed or specific lubrication conditions require it.
There is no universal “best bearing lubricant.” The correct choice depends on the machine’s operating conditions.
A bearing can be correctly mounted but still fail prematurely if the shaft, housing or connected machinery is misaligned.
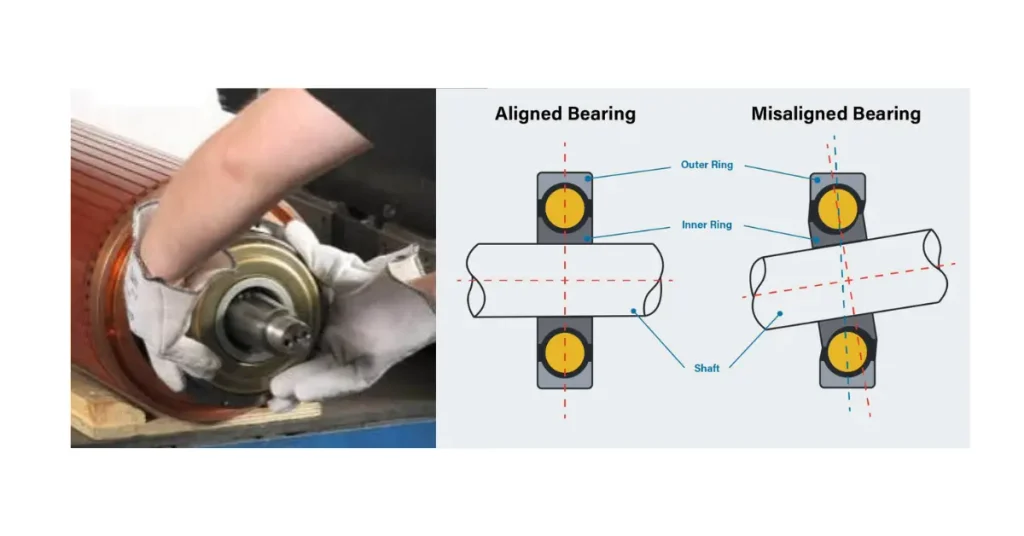
Bearing alignment is particularly important in:
Misalignment can create uneven load distribution and increase:
SKF’s maintenance guidance highlights machine foundation quality, soft foot, shimming, bolt tightening and alignment as important elements of proper machine installation.
For precision machinery, use appropriate alignment instruments rather than relying on visual inspection.
The final mistake is assuming that installation is complete immediately after the bearing reaches its position.
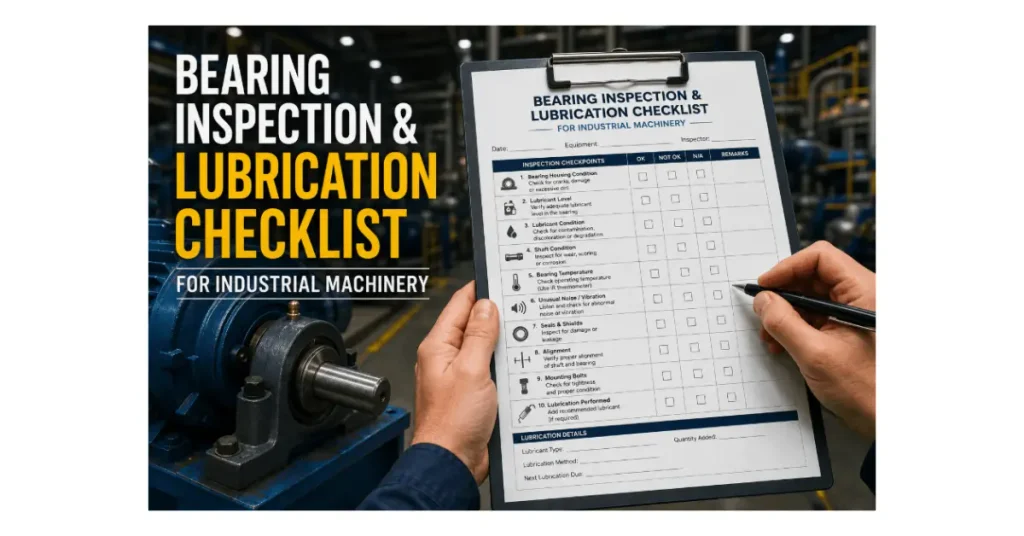
Before startup, perform a bearing installation inspection.
Check:
☑ Correct bearing number
☑ Shaft and housing condition
☑ Correct bearing fit
☑ Correct mounting method
☑ Correct internal clearance
☑ Bearing fully seated
☑ Correct lubrication
☑ Seals/shields undamaged
☑ Shaft rotates smoothly
☑ Housing bolts correctly tightened
☑ Coupling alignment checked
☑ Lubrication system connected
☑ No abnormal mechanical interference
Then perform a controlled test run.
Monitor:
An unusual rise in temperature or vibration should not be ignored.
Consider a 7.5 kW industrial electric motor operating at approximately 1,450 rpm.
The motor uses a deep groove ball bearing. During maintenance, the old bearing is removed and replaced. A technician makes three mistakes:
Initially, the motor starts normally. After several hours, the maintenance team notices:
The bearing is removed for inspection.
Possible evidence may include raceway marks, mounting damage or contamination. The important lesson is that bearing failure may not be caused by the bearing itself. The installation process can be the root cause.
ISO 15243 provides a framework for classifying rolling-bearing damage and failures by characteristics and possible causes, helping engineers investigate failure rather than simply replacing the failed component.
Bearing life is influenced by much more than the bearing’s catalogue rating.
ISO 281 defines methods for calculating basic dynamic load rating and rating life, while modified rating-life calculations can account for factors such as reliability, lubrication and contamination.
For a basic rating-life calculation:
L₁₀ = (C/P)ᵖ
Where:
For constant speed:
L₁₀h = (10⁶ × L₁₀) / (60 × n)
where n is rotational speed in rpm.
However, calculated bearing life should not be confused with actual service life. SKF notes that actual application life is influenced by lubrication, contamination, mounting and environmental conditions.
That is why proper bearing installation is a critical part of reliability engineering.
Modern maintenance teams can use specialized tools instead of improvised methods.
Common bearing mounting tools :
| 1. Bearing fitting kit | Used for small and medium bearings during mechanical mounting. |
| 2. Arbor or hydraulic press | Provides controlled mounting force. |
| 3. Induction heater | Used for thermal mounting of suitable bearings. |
| 4. Hydraulic nut | Useful for certain large and tapered-bore bearings. |
| 5. Oil injection equipment | Used in appropriate large-bearing applications. |
| 6. Micrometer | Used to verify shaft dimensions. |
| 7. Bore gauge | Used to inspect housing dimensions. |
| 8. Dial indicator | Used for runout and alignment checks. |
SKF identifies induction heaters, oil injection kits and hydraulic nuts among specialized bearing mounting and dismounting equipment.
For a general installation workflow:
| Step 1: Identify the bearing | Verify: Bearing number Bore diameter Outside diameter Width Seal/shield Internal clearance Bearing type |
| Step 2: Inspect the shaft | Check diameter, roundness, surface condition, shoulder and fillet. |
| Step 3: Inspect the housing | Check housing bore, cleanliness, damage and alignment. |
| Step 4: Select the mounting method | Choose mechanical or thermal mounting based on bearing size, fit and application. |
| Step 5: Mount the bearing correctly | Apply force only to the appropriate ring during mechanical installation. |
| Step 6: Check seating | Ensure the bearing is correctly positioned against the required shoulder or abutment. |
| Step 7: Lubricate | Use the specified lubricant and quantity. |
| Step 8: Test and monitor | Rotate manually where appropriate and perform a controlled startup while monitoring temperature, vibration and noise. |
The most effective bearing maintenance strategy is prevention.
These simple practices can prevent many avoidable bearing installation failures.
Bearing installation is one of the most important steps in achieving long bearing service life. The biggest installation risks are surprisingly basic: direct hammering, wrong mounting force, contamination, incorrect fit, excessive heating, improper lubrication, inadequate clearance and misalignment.
Most importantly, when investigating a failed bearing, do not automatically blame the bearing. Examine the installation process, fit, lubrication, contamination, alignment and operating conditions.
The bottom line:
Correct bearing + correct fit + correct tools + correct installation = longer service life, lower maintenance cost and greater machine reliability.
For industrial maintenance, that combination can turn a routine bearing replacement into a reliable, cost-effective and failure-resistant maintenance operation.
The correct method depends on bearing type, size and fit. In general, clean and inspect the shaft and housing, select the correct mounting method, apply force to the correct bearing ring, maintain proper alignment and internal clearance, lubricate correctly and inspect the assembly before startup.
Direct hammering on a bearing is not recommended. If mechanical mounting is appropriate, use a proper mounting sleeve or fitting tool so the force is applied to the correct ring and does not pass through the rolling elements.
Common causes include incorrect mounting force, contamination, wrong bearing fit, misalignment, excessive heating, inadequate lubrication, excessive grease, incorrect internal clearance and shaft or housing damage.
Typical causes include impact loading, mounting force through rolling elements, dirty components, improper tools, excessive interference and incorrect heating.
Bearing mounting is the process of installing a bearing onto a shaft or into a housing while achieving the required fit, seating, alignment and operating clearance without damaging the bearing.
Some medium and large bearings with suitable fits may be thermally mounted. Controlled heating methods such as induction heating can make installation easier. The allowable temperature must always follow the bearing manufacturer’s specification.
C3 indicates greater radial internal clearance than the normal CN clearance for the same bearing size and clearance class. Whether C3 is appropriate depends on the application, fit and operating temperature.
Misalignment can create uneven loading, friction, vibration and heat. Proper shaft, housing and machine alignment helps the bearing operate under its intended conditions.
Common tools include bearing fitting kits, mounting sleeves, presses, induction heaters, hydraulic nuts, oil-injection equipment, micrometers, bore gauges and dial indicators.
Check that it is correctly seated, rotates appropriately, has the specified lubrication and clearance, and shows no abnormal noise, vibration or temperature during controlled operation.

Welcome! I am a dedicated entrepreneur running an industrial affiliate product website, helping businesses and professionals find the best tools, equipment, and resources for their needs. With a passion for industrial products and a keen eye for quality, I curate and recommend top-performing items that enhance efficiency and reliability.
Through my platform, I aim to simplify the buying process by providing valuable insights, expert reviews, and trusted affiliate links to high-quality industrial products. Whether you’re looking for the latest machinery, tools, or safety gear, I strive to connect you with the best solutions available.
Thank you for visiting, and I look forward to helping you make informed purchasing decisions!
